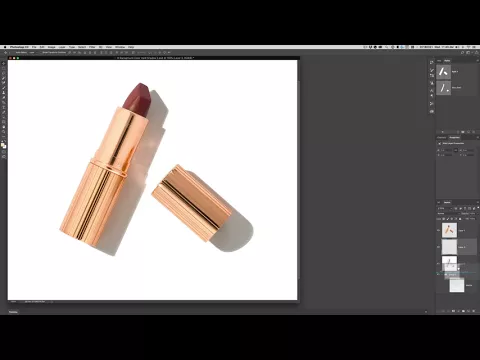
How To Change The Background On A Product Photo
If you want to get creative with your product photos, changing the background to a stylish image or different color can really spice up the shot! We can deliver a Designer’s Ready File aka “A Layered High Res Tiff file” that you can use to easily swap out the background for an awesome dynamic product photo.
Requirements
- The Layered High Res Tif File, ordered online when you get your photos taken
- Adobe Photoshop and some basic knowledge of the software
Video Tutorial
Below you can find a quick video tutorial that will show you how to change the background in Photoshop. We’ll walk through these steps in this guide.
Purchase The Layered Tiff File
First, you’ll need the layered tiff file. When placing your order, make sure to add the Layered High Res Tiff + Clipping Paths file to your order. This can be found under the Advanced File Types section at the bottom of the order form. There is an additional $5 per photo fee for this file type.
This will be the designer’s file you’ll need to change the background using Photoshop. Note that you can always order this file type after your order is completed in case you forgot to add it on, or just decided it’d be useful after reviewing the images.
Note: if you want your photo to have a pronounced shadow like the one in the tutorial, make sure to order the Hard Light Shadow background option. More information about this background type can be found in our guide to hard light shadow!
Download The File
Next, you’ll need to download the file from the Zenfolio gallery. We have put together a handy guide to downloading your files.
Open The File In Photoshop
After you download your file, open Photoshop and bring your image in. It's always good practice to find out the sizing of the image before you start work on it. You can do this by clicking Open... and choosing your file from the popup box.
Once the file is open in Photoshop, you should see the different layers available to work with in the lower right area of the window. There will be separate layers for the product itself and the shadow.
The Different Layers
You will see two different layers: one for the product, and one for the shadow. The shadow layer needs to be set to multiply so that when you swap out the background, it will blend in naturally and look awesome. You can also toggle the visibility of the shadow off altogether.
Add Or Change The Background
Now you can adjust the background. You can either add a background image or just a different color. Add a new layer by clicking the New Layer button in the Layer panel and position it beneath the two existing layers.
The options are endless: add a stylish background like the stock image of marble in the tutorial video for a classy look, or maybe a woodgrain for an outdoorsy feel. Just drag and drop the image into your new layer and resize it as needed.
If you’d rather just change the color, select your new layer and then click the color tool in the toolbar on the left side of the window. Be creative! In the tutorial video, we used the eyedropper tool to choose a color from the product itself. The red lipstick looks beautiful and really pops against the flat gold background! Select Edit > Fill... from the top toolbar and click OK.
And that’s it! Harness your inner artist and get creative with your photo - the sky is the limit!
